LoneRider MotoBags – Compatible with X-Frame Pannier Racks
Our X-Frame pannier racks designed and developed in partnership with Adventure Moto Australia are gaining popularity rapidly. We advertise them as multifunctional pannier racks after all!
Not only do they offer multiple features but they’re compatible with prestigious soft pannier brands such as Mosko Moto, Kriega, Giant Loop, Enduristan, Givi, Wolfman and now LoneRider. The latter has been confirmed by one of our very kind customers from the Netherlands. He went above and beyond to let us know how he managed to mount his LoneRider MotoBags and I have to tell you, it’s very well documented. Read on below.
Disclaimer: we’re by no means associated in any way with LoneRider. I’m simply just sharing this important information on how to install LoneRider MotoBags with X-Frame pannier racks.
“In the beginning it took me some figuring out how to mount the bag to the pannier racks. I wanted to avoid the brackets on the rack frame, but in combination with the back plate of the bags, that proved not possible in the end. So instead of avoiding them, I decided to rather use them.
The following is a description of how to mount the bags to the Outback Motortek pannier racks for the Honda Africa Twin 2018 Adventure Sports (ATAS). I presume this will not be much different from the normal Africa Twin, but I not sure (edit: it’s the same).
Instructions
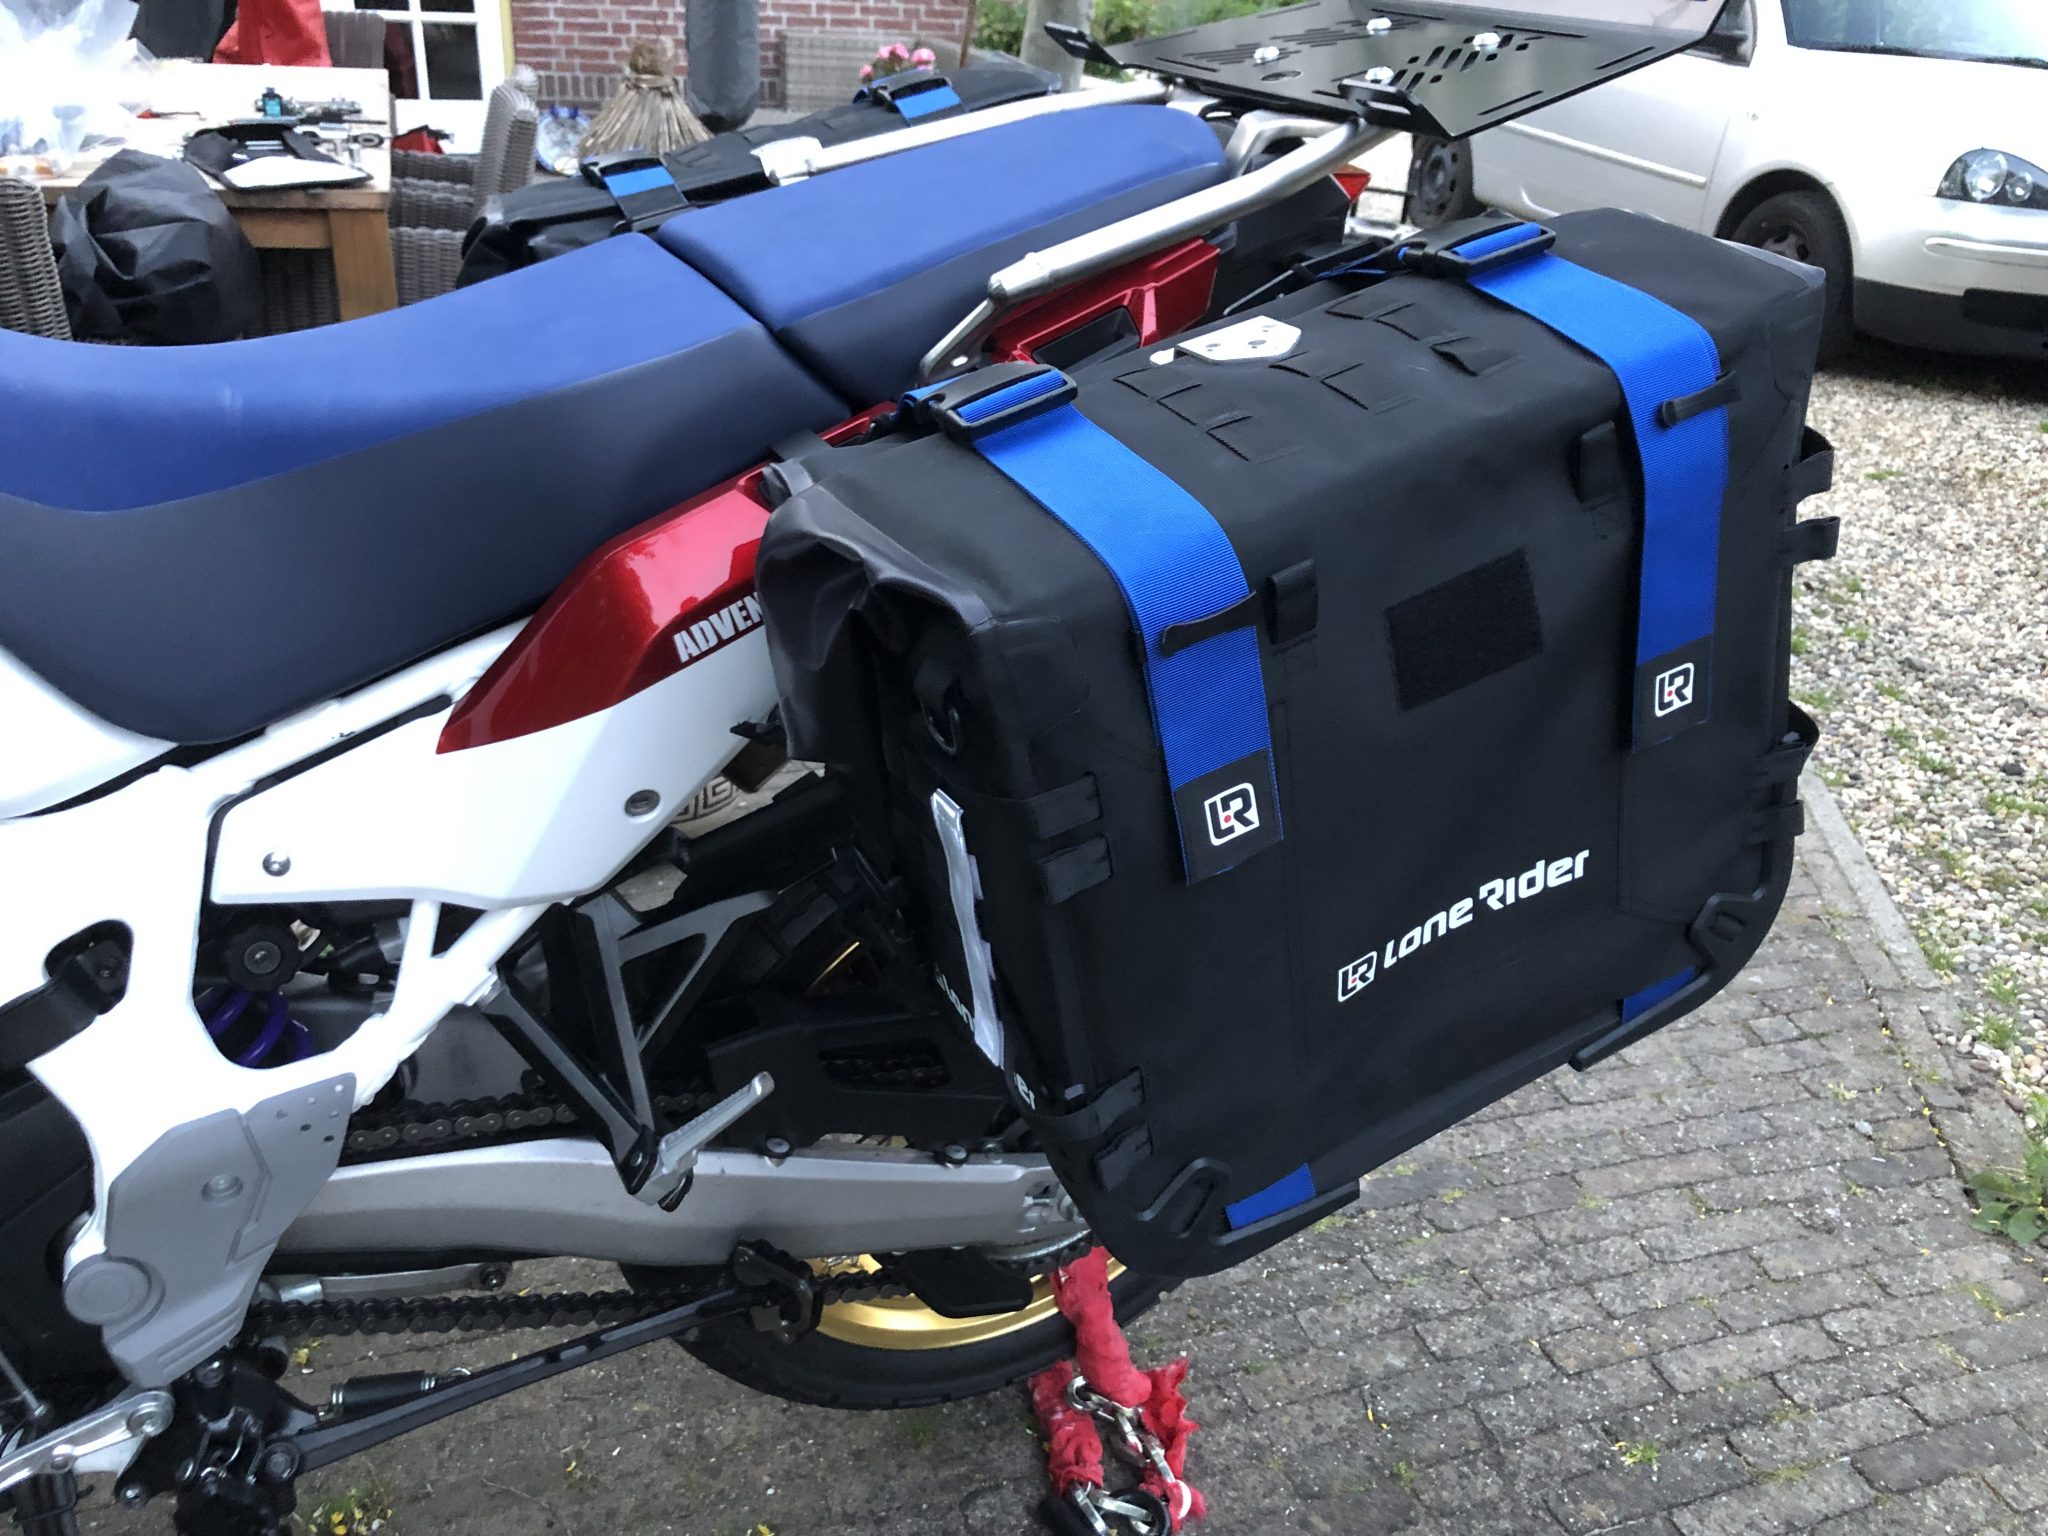
These are the 2 bags. I ordered a 31 and 38 liter bag.
With the asymmetric X-Frame racks, you need to order 2 different sizes to make the bike symmetric. Also a 45 liter bag is available, which needs to be combined with the 38 liter bag.

The bags come with a drybag inside (on top of the waterproof outer bag), mesh bags for luggage, all materials (including a 10mm key for mounting the bags), shoulder band for the inside bags and some other small items. I extra ordered the blue straps to replace the black ones (matches better with the colour of my bike, see pictures above). The quality is really nice and sturdy.

This is the back plate of the bags. It is symetrical and the same for all 3 bag sizes. As you can see, various mounting options. Also note the 4 bolts in the centre of the back plate.

You have to remove the (Rotopax) center plate from the racks. The 4 bolts in the center of the plate stick out to much to fit with the plate.


My instructions are separately for the left and the right rack, since the shape of both racks are different.
Follow the general instructions as in the Lone Rider instruction video.
In the video you first have to measure and mark where the bags need to go on the mounted pannier racks. To save you that time, the best location for the bags is exactly in the middle (with my Africa Twin Adventure Sports), so you don’t have to mount the racks first.
I would advise though to mount the pannier racks already to the bike before adding the bags, since the basic mounting positions allready have been added to the bike (the crossbar mounted to the rear light brackets and the 2 side brackets under the saddle). Just remove the pannier racks for the bags, which is very easy to do (5 minute job).
Left side pannier rack and bag
This is the position for the bolts in the backplate for the left bag. Mount bolts as described in the video.

Put the frame in place for fitting (check position of the bolts). Do not yet tighten the lower nuts. See how the one bolt threads through the little hole (top right set), this way your rack is mounted exactly in the correct position.

Before tightening the frame to the back plate, insert the bolts into the holes for the lower crossbar (connecting the 2 racks behind the number plate). Once the frame is secured to the back plate, there is not enough room to put the bolts back in.

Add the clamps and tighten the rack against the back plate with the locknuts so that the rack does not move anymore (do not completely tighten, yet). First tighten the lower nuts to secure the bolts on the back plate. Now fully tighten the clamps on the frame and start with the nuts that thread through the brackets. The brackets are so sturdy, that they do not bend when the clamps are tightened and they really push the rack to the bag. Finish of with the other 4 nuts.

Due to the shape of the left side pannier rack, it is not possible to put the large top bolt into the pannier rack after the bag has been mounted. When putting in the bolt before mounting the rack to the bag (like the cross bar bolts), it is not possible to tighten the bolt, because the Allen key will not fit.
2 solutions:
– Easiest solution: remove the left side bracket under the seat, insert the bolt from the inside out and put the bracket back (do not fully tighten, since the rack will have to be mounted first). See picture. Tightening with a short Allen key or a pipe wrench to hold the bolt when the rack is remounted.– Or find a regular bolt with the same size and add that one into the rack before mounting the rack to the bag. This bolt can be tightened with regular wrenches.

Right side pannier rack and bag
This is the position of the bolts on the right side bag. The top left bolts are positioned differently from the other side. Do not tighten bolts on bag yet.

Also on this side, do not forget to insert the lower crossbar bolts before tightening the rack to the bag.

This is the right side pannier rack after it has been tightened to the bag. See that the lower bolt of the top left clamp does NOT thread through the hole of the Rotapax plate.

These are some general pictures of how the position of the bolts is to the rack and how they line up to the brackets.


And with the clamps on.


And the end result.


The first bag took some figuring out, with thoughts of having to drill out holes, grinding (parts of) the brackets away and other adaptations.
In the end it was all pretty straight forward and really easy to do without any modifications to the pannier racks.
So without any exaggeration I can say: the Lone Rider Motobags fit the Outback Motortek pannier racks.”