How it went down – Crash Tested Yamaha Tenere 700 Crash Bars
We still have the honour to be the only manufacturer in the world who regularly beat the living soul out of their crash bars. And we keep raising the level (bar).
There’s no picking and choosing anymore. All new crash bars we design and develop must be severely tested before we hand them over to customers. This is our responsibility and promise to deliver real armour and not just decoration to hang lights and bags on.
The road to designing our Yamaha Tenere 700 crash bars was actually fairly smooth. Perhaps it’s the first bike in a while that offers us superb and plenty of mounting points. The lower crash bars alone offer three (!) frame mounted fixing points per side as shown in the photo below.

Then with the upper crash bars added to the lower crash bars, now each side offers four mounting points in total. Why is it so important? In case of a crash, the impact gets distributed and absorbed.
Most other brand Yamaha Tenere 700 aftermarket crash bars only attach to the frame at two points which can result in an overly flexible structure and as such may have poor impact absorbing features.
With our crash bars we never cut corners!

Of course, this is where I don’t want to stop because many want to see proof and such proof is not carried out on a computer screen (simulation) but in real life. 
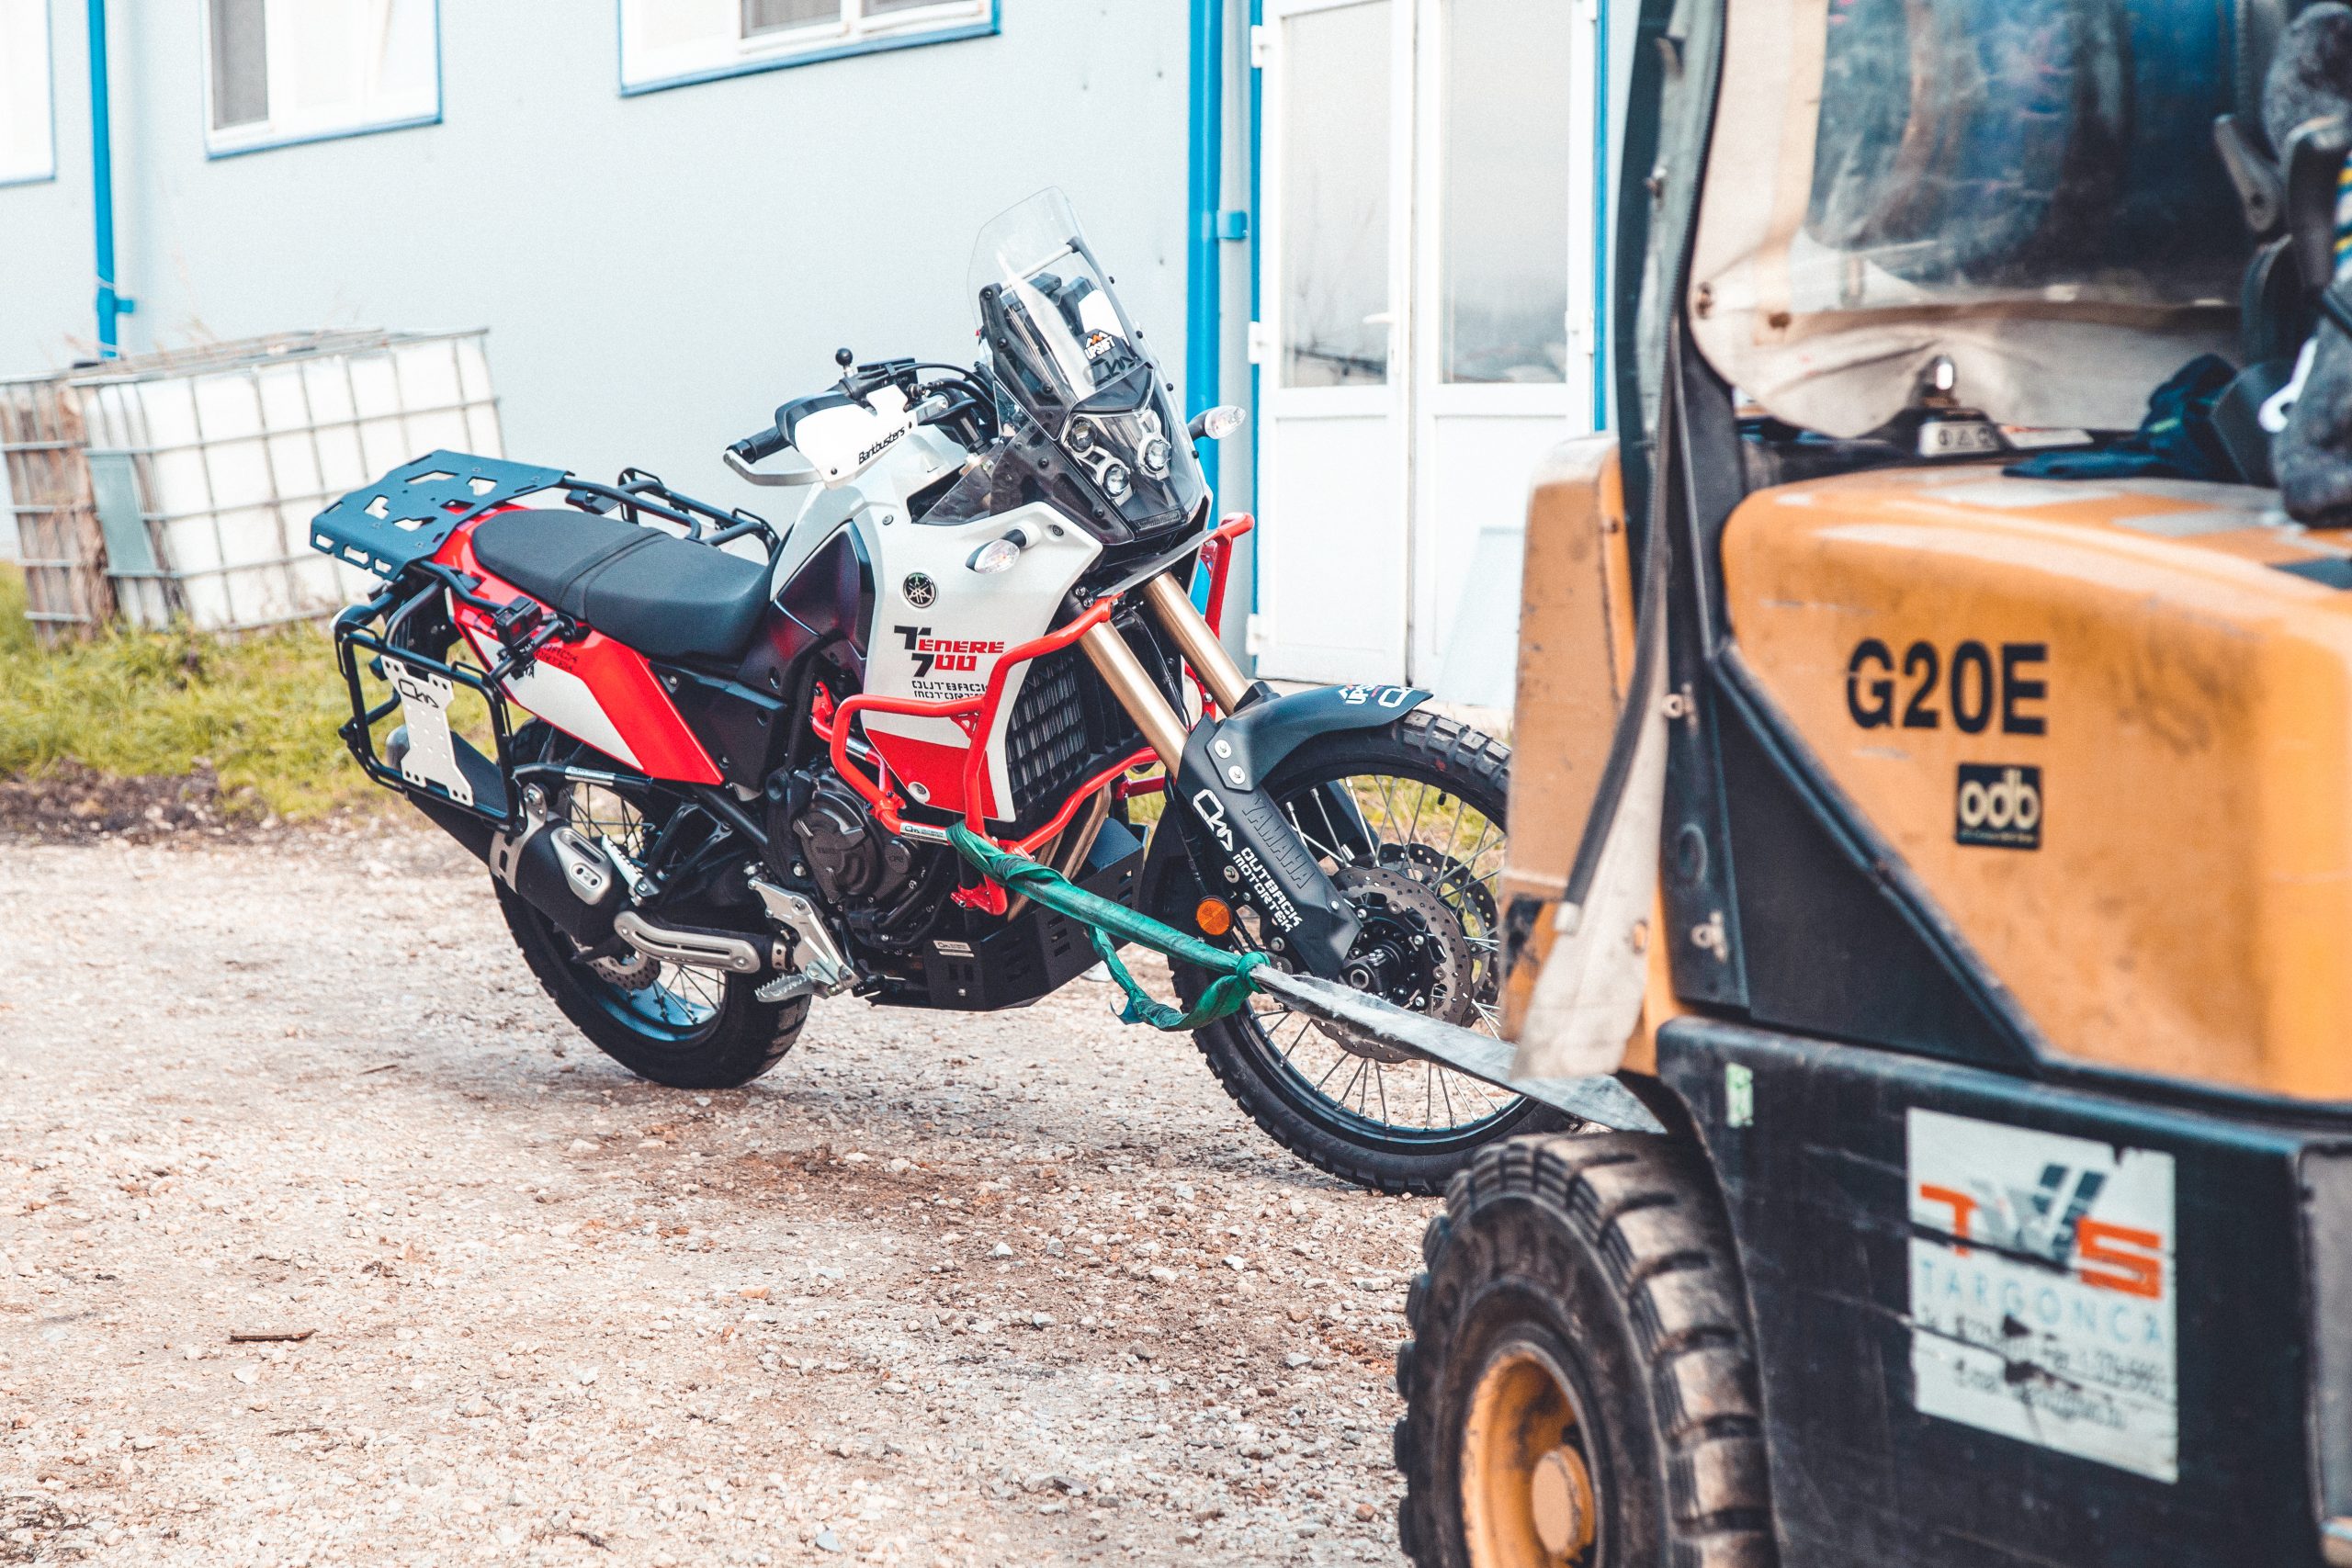
We kicked off with the ground preparations. I wanted to find something of a hybrid ground. Sure enough, there it was behind the factory: a decade or so old gravel driveway used mostly by trucks and heavy machinery. It was definitely rock solid and as rough as it gets. We decided on a “special tool” to get the job done: fork lift.
We have used this to drag other bikes before to test crash bars. It’s got tiny wheels in order to accelerate well, has a strong hitch to withstand the impact of a sudden yank, easy for the driver to glance at the object being dragged. All set.
I’ll kick off with some images but for your information, there’ll be a direct video link to the video version of the test at the bottom of this post! 


One side tested! The full drag length was about 9-10 meters or about 30-32ft. There are significant signs of damage on the crash bars mostly due to being dragged on the rocky ground under the weight of a 200kg bike. No significant impact on one single point indicated by the lack of dented tubing. That’s a good sign! That means the energy from the impact spread and was absorbed well.
Let’s give it a tug on the right side now!


Identical impact and drop on both sides! That’s gotta do! Honestly though, I could post a 100 drop test photos here but it won’t deliver as well as the video would. Click on the image below to play the video.